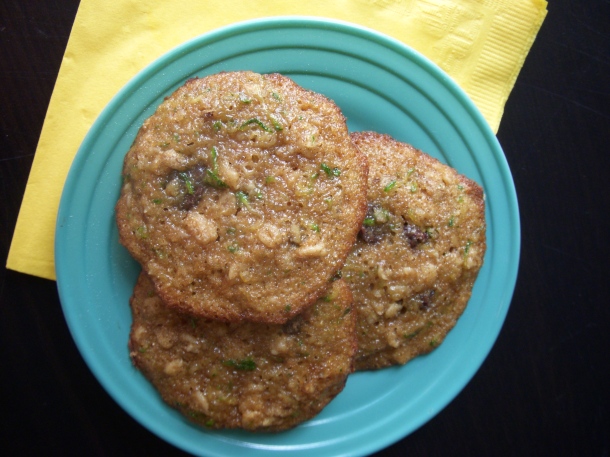
chocolate chip zucchini bread cookies

Posted on

choc zucchini cookies

Zucchini makes me think of J’s little brother, Collin.

Collin is a senior at Texas A&M University- Whoop!  He lives in a house with two other guys- brothers that grew up on a farm.  They planted a garden in the backyard in College Station, and it’s not just a little herb garden or tomato garden.  They have a HUGE, full garden.

choc zucchini cookies_2

When we lived in Texas, we would get buckets overflowing with zucchini and yellow squash.  It was awesome.


As soon as J and I get a yard, Collin is going to come help us get a garden started.  :)  Right Collin?

I adapted a cookie recipe from Martha Stewart.  Martha’s recipe used a cream cheese filling to make cookie sandwiches, but since I was mailing these, that wasn’t going to work.  I wanted to add some sweetness, so I added chocolate chips!  These cookies, however are delicious without the chocolate chips and would be pretty tasty with walnuts.

chocolate chip zucchini bread cookies

Slightly adapted from Martha Stewart

1 cup white whole wheat flour

1 cup old-fashioned oats

1 ¼ teaspoon cinnamon

½ teaspoon baking soda

½ teaspoon baking powder

¼ teaspoon salt

¾ cup unsalted butter, softened (1 ½ sticks)

½ cup granulated sugar

½ cup light brown sugar, packed

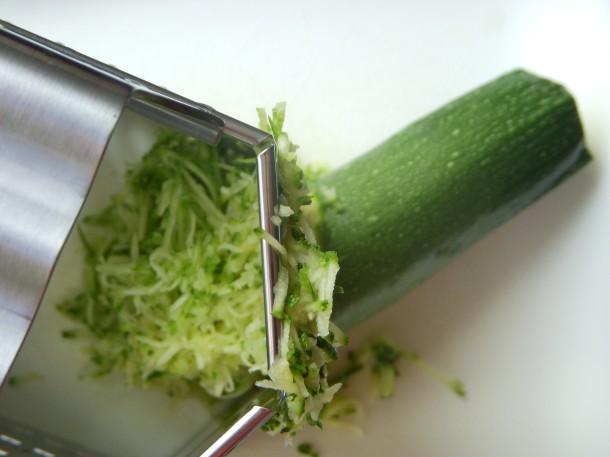
1 cup grated zucchini- (FYI: 1 med zucchini =1 ½ cup zucchini)

1 large egg

1 teaspoon vanilla

½ cup chocolate chips (can substitute with chopped walnuts)

  • Preheat oven to 350 degrees. Sift flour, cinnamon, baking soda, baking powder, and 1/4 teaspoon salt into a bowl. Beat 1 stick butter and the sugars until pale and fluffy. Beat in egg and vanilla.
  • Beat flour mixture into butter mixture. Mix in zucchini, oats, and walnuts. Refrigerate until firm, about 1 hour.
  • Using a 1 1/2-inch ice cream scoop (about 2 tablespoons), drop dough onto parchment-lined baking sheets, spacing about 2 inches apart. Bake until edges are golden, about 17 minutes. Let cool on a wire rack.

Smells like zucchini bread. Very soft, delicate cookie. STICKY.   Cinnamon, moist, chewy. Wheat flavor.  Yum!  Little bites of zucchini bread.    It’s even good without the chocolate

strawberries with balsamic vinegar and almond cream

Posted on

balsamic strawberries

Delicious with almond whipped cream.  The longer the strawberries set, the soggier they will get, so it’s best to eat this the day you make it.  However, I had leftover strawberries that I put on a spinach salad the next day, and I still thought the berries tasted good.  The strawberries are so yummy as a salad topping, no salad dressing needed!

strawberries with balsamic vinegar and almond cream

Adapted from Allrecipes.com

16 oz fresh strawberries, sliced

¼ cup balsamic vinegar

¼ cup granulated sugar

Place strawberries in a bowl.  Add vinegar and sugar and gently stir to combine.  Cover and refrigerate for at least one hour.

Place strawberries in a bowl. Drizzle vinegar over strawberries, and sprinkle with sugar. Stir gently to combine. Cover, and let sit at room temperature for at least 1 hour but not more than 4 hours. Just before serving, grind pepper over berries.

Almond Cream

1 cup heavy whipping cream

1 teaspoon almond extract

1 tablespoon granulated sugar

soft chocolate cookies w/peanut butter frosting

Posted on

Choc_pb

April was a busy month with visitors for J and me.  Blake and Amanda were here during J’s Birthday in the middle of the month.

Philip visited the following weekend, and then my parents were here at the end of the month/beginning of May.

choc_pb2

I loved being busy with visitors!  I got to try out several new restaurants, bars, and bakeries.  I also tried expresso for the first time- thanks Phil!

choc_pb3

Unfortunately for J, I didn’t have time to bake him a Birthday cake, so I made these cookies as a belated B-day dessert.

I did surprise him with a slice of red velvet (from across the street) the morning of his Birthday, but he still deserved a homemade treat.

choc_pb4

J loves his Reeses peanut butter cups, so that was the inspiration for these cookies.  The peanut butter is his favorite part- crazy person!  He also is a soft cookie person.

I, personally, am an any-kind-of-cookie girl.

Soft, hard, chewy, crunchy.  I love them all.  Except for stale cookies…

choc_pb5

Which brings up another weird thing about J.  He prefers his Oreo cookies stale… stale!

He will intentionally leave the bag open so they will get stale… and soft.  I prefer Oreos crunchy-  aka not stale!  The way they were intended to be consumed!

choc_pb6

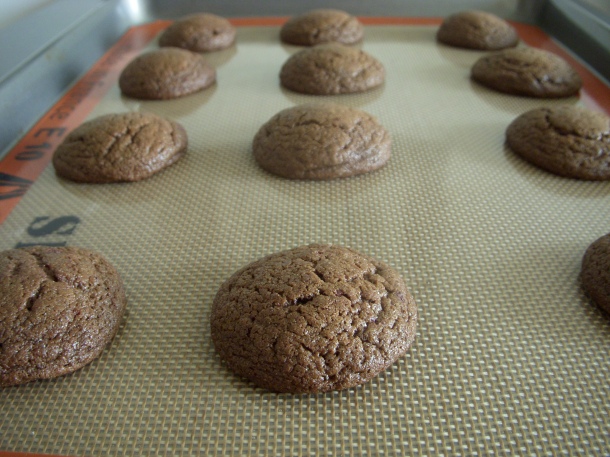
These cookies tasted great on their own, however, as far as J is concerned, everything is better with frosting!   The frosting has a nice fluffy consistency- perfect with the soft cookies.

Chocolate and peanut butter-YUM!  Can’t really go wrong with that combo.

Soft Chocolate Cookies with Peanut Butter Frosting

Soft Chocolate Cookies   

From Allrecipes.com

Makes 4-5 dozen cookies

1 cup unsalted butter, softened

1 ½ cups sugar

2 eggs

2 teaspoons vanilla

2 cups all-purpose flour

2/3 cup unsweetened cocoa

¾ teaspoon baking soda

½ teaspoon salt

  1. In a large bowl, cream together butter and sugar.  Beat in eggs, one at a time.  Beat in vanilla.
  2. In separate bowl, combine flour, cocoa, baking soda and salt; mix well.
  3. Gradually add dry ingredients to creamed mixture and combine well.
  4. Cover and refrigerate dough for about 1 hour.
  5. Preheat oven to 350 degrees.  Line cookie sheet with parchment paper or silicone mat.
  6. Roll dough into 1-inch balls and place about 2 inches apart on prepared cookie sheets.
  7. Bake for 8 minutes.  Cool cookies for a few minutes before transferring to wire rack.  **Optional** Instead of frosting cookies, dust warm cookies with confectioner’s sugar.

Peanut Butter Frosting

Adapted from Allrecipes.com

Double recipe if frosting cookies individually (not making cookie sandwiches) or if extra icing desired.

¼ cup unsalted butter, softened

½ cup creamy peanut butter

1 cup powdered sugar

½ teaspoon vanilla

1 tablespoon milk (use more milk as needed to reach desired consistency)

  1. In medium bowl, beat butter and peanut butter with mixer.  Gradually beat in sugar.
  2. Mix in vanilla.  Add milk (one tablespoon at a time until desired consistency is reached).  Beat frosting for ~3 minutes.
  3. Holding cookie bottom-side up, spread about 1-2 tablespoons of frosting on cookie.  Top with another cookie to create cookie sandwich.  Repeat with remaining cookies and frosting.

choc_pb7

s’mores bars

Posted on

smores_bars1

One of J’s friends requested these for his Birthday.  He remembered them from the assortment of Christmas cookies I gave him in December.

smores_bars2

My mom, sisters and I go a little crazy with baking at Christmas time.  We always start out with the intention of being organized, however, no matter how much planning, phone calls or lists we make, our annual Christmas baking ends up being a bit chaotic– and I love it that way!

It wouldn’t be nearly as fun if everything went smoothly and exactly as planned.  :P

smores_bars3

Sometimes one of us introduces a new recipe to try.  After serious taste-testing, the recipe will be eliminated, added to the “every few years” list, OR  if it’s a really good recipe, it will be added to the permanent list of annual Christmas cookies.

smores_bars4

This s’mores bar recipe was added to our rotation a few years ago.  My mom got the recipe from a co-worker at church, and we have been winning over peoples’ hearts with it ever since.

I’m pretty sure my brother’s girlfriend is still dating him just for the s’mores bars she knows she’ll get at Christmas.  ;)  Just kidding Dave!

smores_bars5

This is one of the recipes that will be baked every year no matter what.  Not only is it delicious, but it’s a bar cookie, so it’s super easy to make too.

smoresbar6

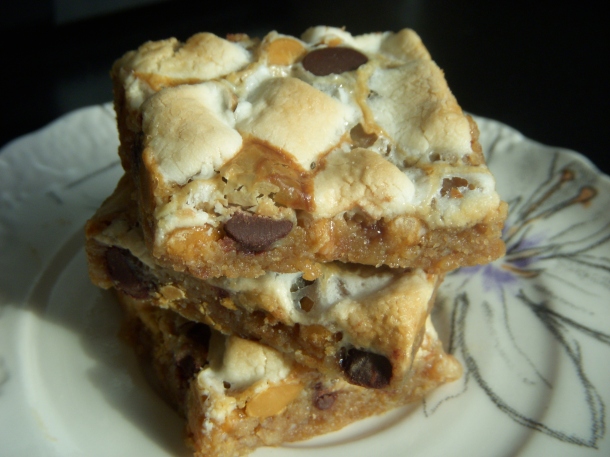
These aren’t always the prettiest cookies, but you forget about that once you taste them.

smores_bars7

By lining the bottom of the pan with parchment paper, you’re able to transfer the bars to a flat surface for easier cutting.  It also helps if you wipe the blade off in between cuts.

smores_bars8

Gooey, sticky sweet deliciousness.

S’mores Bars

½ cup unsalted butter, melted

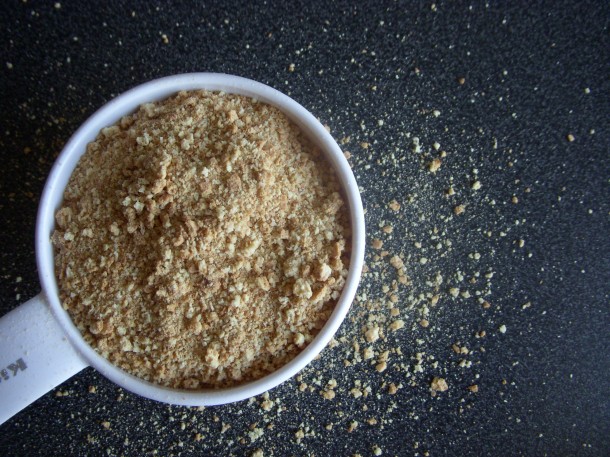
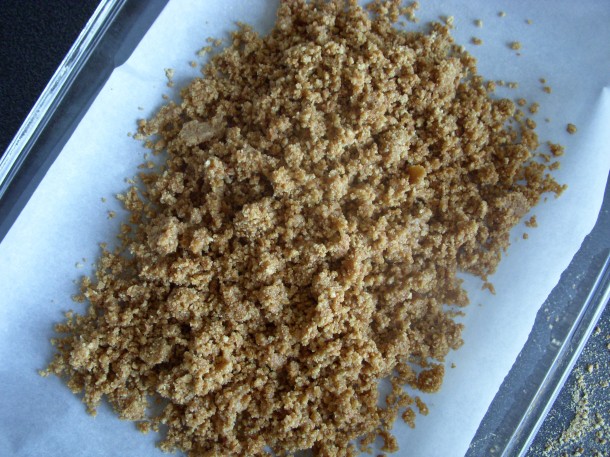
1 ½ cups graham cracker crumbs (=8 whole graham crackers or 1 package)

1 (14 ounce) can sweetened condensed milk (I normally use fat free)

¾ cup chocolate chips

¾ cup butterscotch chips

1 ½ cup miniature marshmallows

  1. Preheat oven to 350 degrees.  Line the bottom of a 13 x 9-inch baking pan with parchment paper, making sure the left and right edges stick out for easy removal later.
  2. Combine butter and graham cracker crumbs; mix well.  Press into bottom of prepared pan.
  3. Carefully pour sweetened condensed milk evenly over crumb mixture.
  4. Sprinkle chocolate chips and butterscotch chips over condensed milk.  Top with marshmallows.  Using your hands, firmly, but carefully, press down on bars.
  5. Bake about 25 minutes or until edges are golden brown.  Cool completely.
  6. Move bars from baking pan to a cutting board by gripping the edges of parchment paper sticking out on both ends.  Refrigerate or freeze bars for ~1hr to make cutting easier
  7. Cut into bars.  Store in air-tight container at room temperature.

irish soda bread

Posted on

This is my second time making Irish soda bread and I was happier with this recipe than the last one I used.


I don’t think DH was too thrilled with the caraway seed which has a very distinct flavor.  I enjoyed it though!

Caraway seeds are often found in rye bread.

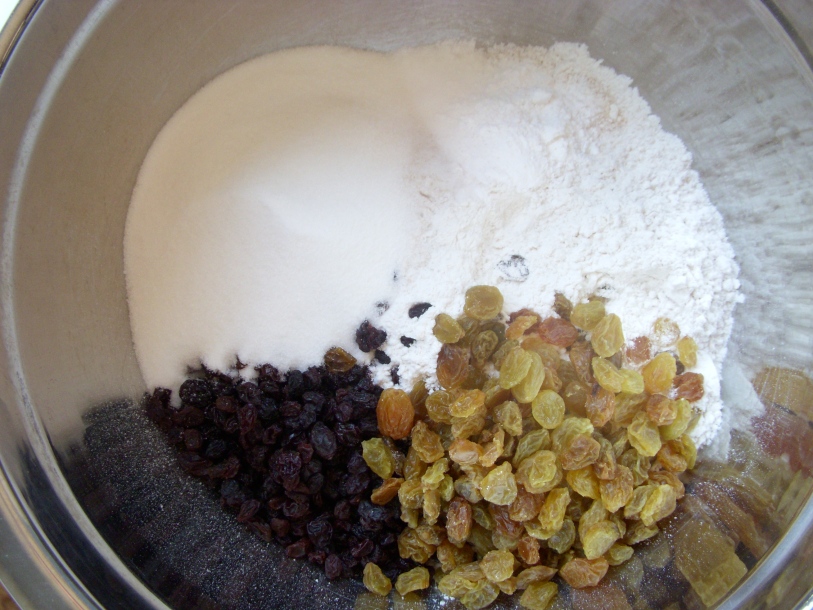
Most Irish soda bread recipes call for raisins or currants (mini raisins!).  I’ve also seen golden raisins used.  I decided to use both currants and golden raisins.

Currants are smaller than regular raisins (see picture above) so they spread more evenly throughout the bread.

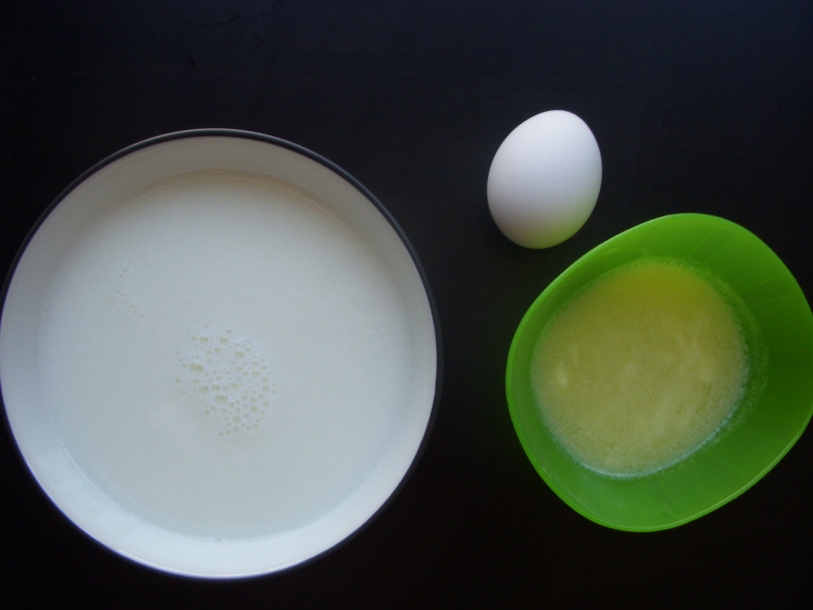
If you’re like me, and you normally don’t have buttermilk, you can use this easy buttermilk substitution:

Combine 1 cup milk + 1 tablespoon of white vinegar

Let stand about 5 minutes.  You should see little bubbles on top (see picture below)

You can also use lemon juice if you don’t have vinegar.

I don’t buy buttermilk often because I don’t enjoy drinking it.  What am I supposed to do with the leftovers after I’ve used what I needed for the recipe?

The only person I know who does like drinking buttermilk, is my dad.  Now that I think about it, Brittany probably does too, but that I don’t know for sure.  I’m just guessing, since she likes everything-like my dad!

Growing up my dad would try to encourage my siblings and I to taste new food/drinks by giving us money to try it.  This really didn’t happen very often- only a few times.

One of those instances involved a glass of buttermilk.  I remember the deal was we would get a little bit of money for just tasting it (maybe a dollar or less).   BUT, if we could drink the whole glass of buttermilk, we would get five dollars.  Five whole dollars.

I couldn’t get down more than the first sip, but David (my twin brother), he was able to choke down the whole glass.  I was jealous of the money, but it wasn’t worth it to me!

Buttermilk does wonderful things for baked goods–muffins, breads, biscuits, pancakes.  And as far as I’m concerned that is the only reason to buy buttermilk.

This bread tastes soo good toasted with butter and/or jam!

Irish Soda Bread

Adapted from King Arthur

Makes 6 mini loaves or 1 large loaf

2 cups white whole-wheat flour

1 cup all-purpose flour

1 tablespoon baking powder

¼ teaspoon baking soda

3/4 teaspoon salt

½ cup granulated sugar

½ cup currants

½ cup golden raisins

1 tablespoon caraway seeds, optional

1 large egg

1 ¾ cup skim milk*

1 tablespoon + 2 teaspoons white vinegar*

4 tablespoons unsalted butter, melted

*If you have buttermilk, substitute it for the milk and leave out the vinegar.

  1. Preheat oven to 375 degrees F.  Grease mini loaf pan- 6 mini loaves (or 9″ x 5″ loaf pan).
  2. In a measuring cup or small bowl, combine milk and vinegar—set aside.
  3. In a large bowl, stir together flour, baking powder, baking soda, salt, sugar, currants, raisins and caraway seeds.
  4. In a separate bowl, whisk together milk mixture (or buttermilk) and egg
  5. Gently stir wet ingredients into dry ingredients.
  6. Stir in melted butter.
  7. Pour batter into prepared bread pan.
  8. Bake bread for 25-30 minutes (50 minutes – 1 hour if making one large loaf) or until toothpick inserted into center comes out clean.
  9. Loosen edges of each loaf and let sit for 5 to 10 minutes.
  10. Carefully turn loaves out onto cooling rack.  OR transfer to cutting board and dig in while it’s still warm!  Store in airtight container at room temperature.

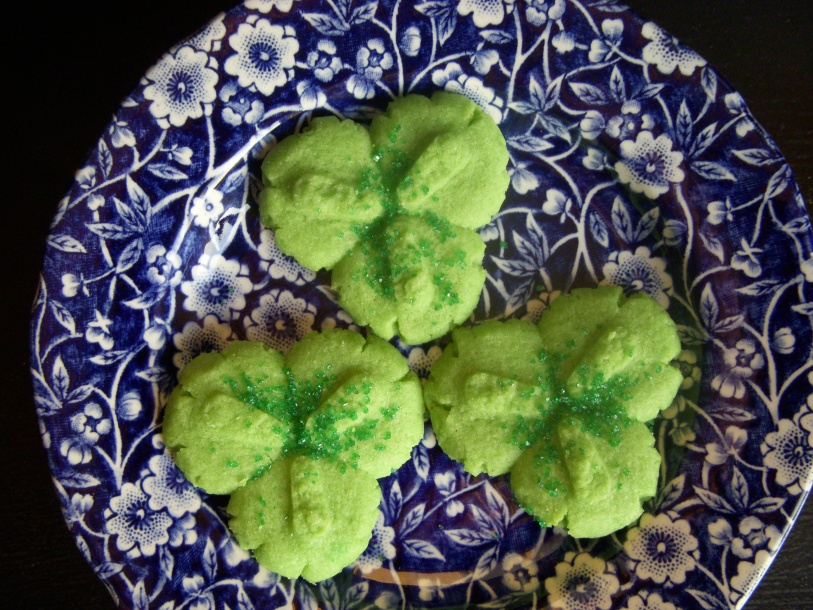
I made spritz cookies to take in to work on St. Patrick’s Day.  I try to bring in baked treats whenever I have to work a holiday.  :)  I’ll post the recipe later.

challah french toast

Posted on

Brittany and Katie came to visit last weekend- finally!!  I’m still waiting on Meagan to get her cute butt up here.  ;)

We were running all over Manhattan and Brooklyn the whole time they were here!  We went to Rockefeller Plaza to see the Christmas tree, went shopping at Chelsea Market, had drinks and popcorn at 4th Ave Pub, ate pizza at Fascati’s, took pictures on the Brooklyn Bridge…

Katie and I also went ice skating at Central Park—at the skating rink from Serendipity.  :)

Challah bread was new to me when I moved to NYC.

Challah (pronounced hah-lah) is a traditional Jewish egg bread eaten on the Sabbath and Jewish holidays.

My first experience with challah was at a diner in Brooklyn.

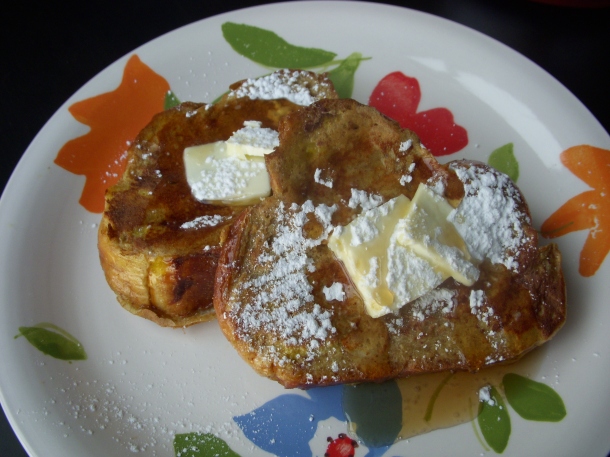
French toast made with challah.

After my first bite I was hooked—so perfect together!

I wanted to share my discovery with Katie and Britt so I made challah french toast for brunch while they were here.

The bread soaks up the egg mixture and the end result is soft, sweet, golden french toast.  dE-licious!

Challah French Toast

5 eggs

1/3 cup milk

1 teaspoon vanilla

2 teaspoons sugar

1 teaspoon cinnamon

1 challah loaf- about 12 inches (I used whole wheat)

  1. In a shallow bowl, whisk together eggs, milk and vanilla.  Stir in sugar and cinnamon.
  2. Set griddle to 300 degrees.  While griddle pre-heats, slice challah into 1 inch slices.
  3. Dip each slice in egg mixture, flip 2-3 times.  Allow excess egg mixture to drip off into bowl and place on pre-heated griddle.
  4. Cook ~3-5 minutes on each side or until golden brown.
  5. Serve warm topped with butter and syrup or powdered sugar.

**To keep warm, set oven to 200 degrees.  Place French toast on a baking sheet or oven-safe plate, cover with foil (optional) and keep in warmed oven until ready to serve.

cranberry walnut oatmeal cookies

Posted on

Every year during cranberry season I think about using the berries for decoration… but I have yet to do this.

There are so many creative ways to use them!  They make simple, pretty centerpieces, festive holiday decor and tasty snacks.  Love the idea of putting cranberries in a mason jar.

And I definitely have to try this Sparkling Cranberry Centerpiece – edible decorations!?  Yes please.

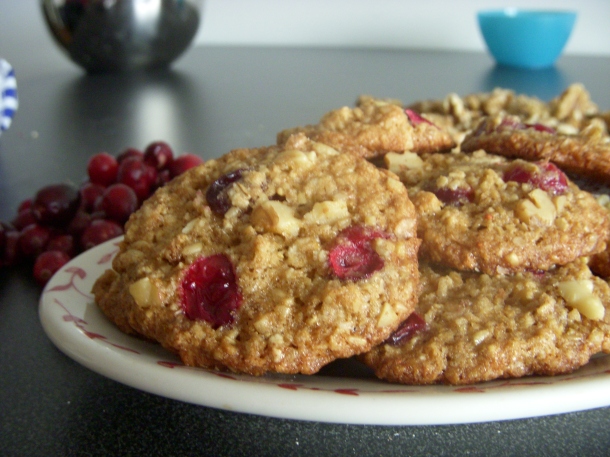
And of course, you can substitute dried cranberries with fresh cranberries in a recipe like I did — only when cranberries are in season (and cheaper!) that is  ;)

This recipe specifically says NOT to use instant or quick-cooking oats, but that was all I had AND I didn’t even have enough of that.  I had to use a ½ cup ground oats I had leftover from making pancakes.

This is a light, delicate cookie that falls apart in your mouth.

Wholesome wheat-y, oat flavor with a tangy zing from the cranberries–Yum!  A cookie you can eat for breakfast and not feel bad about.  :D

Cranberry-Walnut Oatmeal Cookies

slightly adapted from Cookie Madness

1 cup instant oats, ½ cup ground oats (OR use 1 ½ cups old-fashioned oats)

½ cup white whole wheat flour

¼ teaspoon baking powder

½ teaspoon baking soda

½ teaspoon salt

½ teaspoon cinnamon

6 tablespoons unsalted butter

½ cup brown sugar

¼ cup sugar

1 egg

1 teaspoon vanilla

1/3 cup chopped, toasted walnuts + 3 tablespoons

1/3 cup fresh cranberries, halved or quartered + 3 tablespoons

  1. Preheat oven to 350 degrees F.  Line cookie sheet with silicone mat or parchment paper
  2. Combine 3 T walnuts and 3 T cranberries in a small bowl; set aside for later.
  3. Mix together oats, flour, baking powder, baking soda, salt and cinnamon; set aside.
  4. Using hand mixer, beat butter and sugars until light and fluffy.  Add egg and vanilla and blend well.
  5. Add dry ingredients to butter mixture and stir together.  Add remaining 1/3 cup walnuts and 1/3 cup cranberries; mix well.
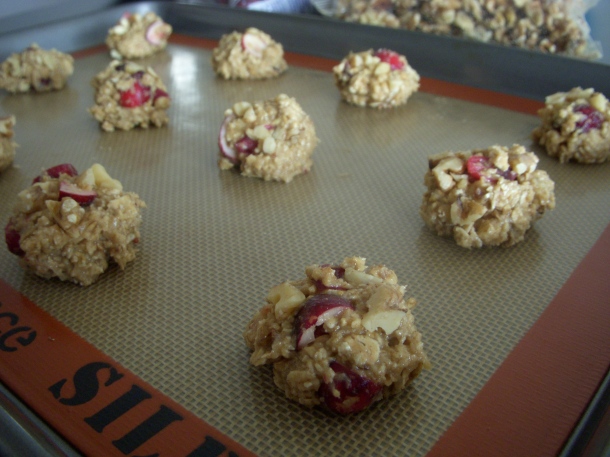
  6. Scoop dough by rounded tablespoons onto cookie sheet, spaced about 1 ½ to 2 inches apart.  Using the reserved walnuts and cranberries, press a few gently on top of each dough ball.
  7. Bake for 12-15 minutes, or until golden brown.  Cool cookies on sheet for about 5 minutes before carefully transferring to cooling rack.

apple spice cupcakes with rum buttercream

Posted on

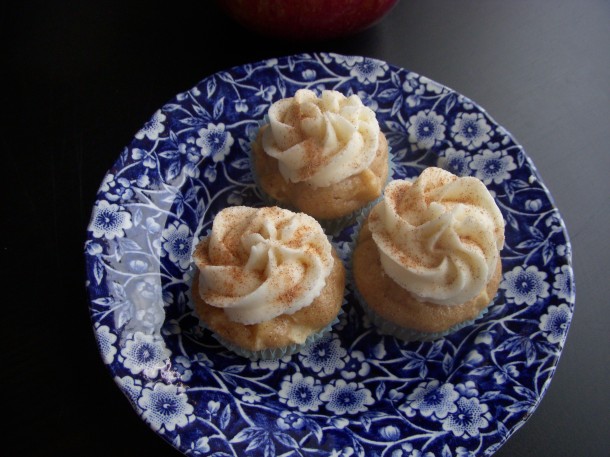
Originally these cupcakes were for my DH to share with his co-workers, however, since they have rum *gasp*, he decided it would be best if he did not bring them to the hospital.  I, on the other hand, had no problem bringing them in to share with my co-workers, and they were very much appreciated.  :)

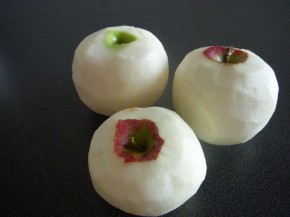
Use whichever type of apples you prefer to bake with.  I had Cortland apples so that’s what I used.

You can still see the sweet, chunky bits of apple after baking the cupcakes.  Apple in every bite!

One thing I like about using fruit in a dessert is being able to pretend it’s good for you!  It does have more nutritional value thanks to the apple. :)  You could also substitute some of the flour with whole wheat flour and still have delicious cupcakes.

I have to admit, you could definitely smell the rum in the cupcakes… So I guess I can understand DH’s hesitation to bring them to the hospital to share with his Attendings and senior residents.  The aroma was more overpowering than the taste of rum.

apple spice_8

The combination of apple, cinnamon and rum buttercream is just what the doctor ordered*!

*I typed “perfect” originally and wanted see my other options. I checked synonyms on Word and what do you know, this was one of the synonyms for perfect.  It was too funny not to use.  :)  Also, it’s a joke with DH.  Right after graduating from med school he made a comment to me saying, “It’s just what the doctor ordered.”  And I was like, “Oh no, that’s going to get old!”

Apple Spice Cupcakes

adapted from Allrecipes.com

Makes about 17-18 cupcakes.  (I made a dozen regular-sized cupcakes and a dozen mini cupcakes)

Cupcakes

2 ¼ cups all-purpose flour

¼ cup brown sugar

¼ sugar

2 teaspoons cinnamon

1 tablespoon baking powder

2 eggs

¾ cup milk

¼ cup butter, melted

1 teaspoon vanilla

3 cups chopped apple, peeled* (3 small apples or 2 ½ large apples)**

*Optional- depending on your preference, cupcakes taste good with or without the apple peel.

**If you choose to peel apples or if you have leftover chopped apple, set aside for later and see below.

Icing

¾ cup unsalted butter, softened

¼ cup shortening

1 pound powdered sugar (~4 cups)

2 oz. dark rum (I used ~1 shot)- adjust as needed

Make the Cupcakes:

  1. Preheat oven to 350 degrees F.  Lightly grease muffin pan or line with paper liners.  Makes 18 cupcakes.
  2. In a large bowl, stir together flour, sugar, brown sugar, cinnamon and baking powder; set aside.
  3. In a separate bowl or large measuring cup, whisk together milk, eggs, melted butter and vanilla.
  4. Create well in center of dry ingredients.  Gradually pour wet ingredients into well and gently stir until until combined.  Careful not to overmix.
  5. Gently fold chopped apples into batter.
  6. Spoon batter into prepared muffin pans, filling about two-thirds full.
  7. Bake for 20 minutes or until toothpick inserted in center of cupcake comes out clean.  For mini cupcakes 10 minutes.
  8. Allow cupcakes to cool completely before frosting.

Make the Icing:

  1. Cream butter and shortening in a large bowl.
  2. Slowly add powdered sugar and blend after each addition (about 1 cup at a time)
  3. Add rum and mix well.
  4. If piping frosting onto cupcakes, I put the icing in the fridge for 30 min- 1 hour.  This way the icing is a little thicker and easier for me to pipe—trick I learned from my mom.  Thanks Mom!
  5. Frost cooled cupcakes and sprinkle with cinnamon sugar.  Enjoy!

Leftover Apple and Apple Peel

I had ½ an apple left and I didn’t want to waste all the apple peel (lots of good nutrients and fiber!) so.. I made a treat out it to serve as a topping on my English muffin.

Combine leftover apple and apple peel with ¼ cup water, 2 tablespoons sugar, and ¾ teaspoon cinnamon in a medium saucepan.  Heat over medium-low heat for about 5 minutes or until apple is desired consistency.

This apple topping is delicious plain, with yogurt, or on a toasted English muffin!

homemade pop tarts

Posted on

My older sister came to visit from Houston, Texas!  Actually, she was in NYC for work.  She wasn’t in town for sight-seeing… which she had to remind me over and over.  Luckily for me, it worked out that she was able to spend her evenings with me.

I thought it would be nice to surprise her with these homemade pop tarts!  I’ve wanted to make them for a while now (after seeing them in a food magazine).  Everything seems to taste better when it’s homemade.  :)

2

I wasn’t sure what I wanted to fill them with until I bought this pumpkin butter at Trader Joe’s.  I knew it would be the perfect filling for my fall pop tarts!

4

My sister got in quite a workout while she was here… I forgot how sore I was when I first moved to NYC from all the walking.

ANY CHARACTER HERE

I had her walking all over Manhattan and Brooklyn.  We weren’t walking very slowly either.  :/

One night for dinner, I convinced her we needed to try a pizza place in Brooklyn.  She was a little hesitant since she was exhausted from training and starting to feel hungry (and her hotel was in the Financial District of Manhattan) but she finally agreed. 

2

On the way to dinner, I might have lead her towards the Brooklyn Promenade without letting her know..

..or asking if she even cared to see it (because I had decided on my own it was something she had to see before she left).

3

6

Our little detour added about 10 minutes… she was really hungry by then…and she was not a happy camper when she realized what was going on. Oops.

4

We finally got to the restaurant after a 30(ish) minute walk..

..not including the subway ride over.. or the walk to the subway.

2

:/
10
4

Luckily we didn’t have to wait long for our dinner!  And I thought it was definitely worth the walk.  :)

Great ambiance and delicious pizza!

2

Right Beck?
6

And!

We had these tasty pop tarts to look forward to for dessert when we got back to her hotel! :)

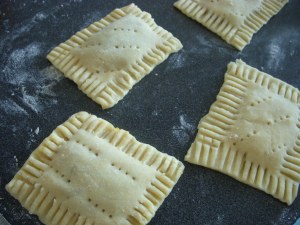
Perfect with coffee.  Flaky, buttery pieces of deliciousness… mmmm.

Pretty sure the pop tarts helped her forgive me  :P  (Also, we found a subway stop 5 min from the restaurant after dinner)

4

Next time, I’ll make sure I have ice cream to serve with these. Warm pop tarts with a scoop of vanilla ice cream– yum!

I filled half of the pop tarts with a brown sugar cinnamon mixture (for my husband who doesn’t love pumpkin as much as I do).

6

These would be delicious filled with chocolate chips or strawberry preserves. Oh! Or Nutella!

3

If you like pie crust, then you will love these!  Sooo flaky and delicious!

5

Homemade Pop Tarts

recipe slightly adapted from King Arthur

Dough

2 cups all-purpose flour (can substitute 1 c flour with whole wheat flour)

1 tablespoon sugar

1 teaspoon salt

1 cup unsalted butter, cut into ~ ½ inch cubes

1 large egg

2 tablespoons milk

Brown Sugar Cinnamon Filling (This makes enough to fill all 9 pop tarts.  I halved it since I was filling some with Pumpkin Butter.)

½ cup brown sugar

2 teaspoons cinnamon

4 teaspoons all-purpose flour

1 large egg (to brush on pastry)

Make the dough

  1. Stir together flour, sugar and salt.  Work butter into dry ingredients until the mixture holds together when you squeeze it (a pastry blender can be used to do this OR you can use your hands-which is what I did).  Lumps of butter should still be visible.  Add egg and milk and mix until combined.
  2. Divide dough in half and shape into two rectangles (about 3”x5”).  Wrap each dough in plastic (separately) and refrigerate for an hour or overnight.  Chilling the dough makes it easier to work with later.

Prepare the filling

Mix together sugar, cinnamon and flour–set aside.

Assemble the tarts

  1. Remove dough from the fridge and allow it to sit out at room temperature about 15 minutes to soften.  On a lightly floured work surface, roll out one piece of dough about 1/8” thick.  You want the rectangle to be large enough that it can be trimmed down to an even 9”x12” rectangle.  Using a pastry wheel (or pizza cutter) rim edges and set aside scraps for later.  (Next time I want to use a fluted pastry wheel to make them fancier)
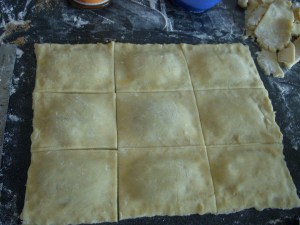
  2. Repeat step 1 for the second piece of dough.  Gently score the second piece of dough into thirds lengthwise and widthwise—creating 3”x4” rectangles.  (I used a metal ruler to do this)
  3. Beat the egg in a small bowl with a fork.  Brush the egg over the entire surface of the dough you just scored.  Place about 1- 2 tablespoons of filling in the center of each rectangle.
  4. Gently pick up the first piece of dough and place on top of the dough with “puddles” of filling.  Press down firmly around each filling “puddle”- sealing the dough well on all sides.  Using a fork, prick the top of each filling mound multiple times.  This is to ensure steam can escape during baking.  If you are using multiple fillings, you can put different designs on your pop tarts to differentiate which pop tarts have which filling.  For example, use horizontal fork pricks for one filling (cinnamon sugar) and slanted fork pricks for the other (pumpkin butter).
  5. Cut the dough evenly in between the mounds of filling –creating nine 3”x4” pop tarts.  Use your fingers to press down the cut edges to seal.  Using the tines of a fork, press all around the edge of each pop tart.
  6. Lightly grease a baking sheet (or line with parchment paper).  Gently move the pop tarts to prepared baking sheet.  Place the pop tarts in the refrigerator to chill for 30 minutes.  Preheat oven to 350 degrees F.
  7. Once the pop tarts have chilled, bake for 25-35 minutes or until light golden brown.  Allow pop tarts to cool on pan.
  8. Frost and decorate pop tarts as desired!  I used a simple glaze on mine.  I put sprinkles on the pumpkin filled tarts and a cinnamon glaze on the brown sugar ones to differentiate them.  (DH would not have been happy if he accidentally bit into a pumpkin pop tart expecting brown sugar.  :P)

Dough Scraps (no wasted dough allowed-it tastes too good!)

Arrange pastry scraps on parchment-lined baking sheet.  Sprinkle with cinnamon sugar and bake for 13-15 minutes until light golden brown.

OR

Make mini tarts—Do the same thing you did above (Assemble the tarts).  Form dough scraps into two balls and roll out on lightly floured surface.  Set aside one piece of dough and top other piece with filling of your choice.  Top with other piece of dough, press edges around filling to seal and prick the mounds of filling with a fork.  Cut the tarts out and place on prepared baking sheet.  Bake for 13-15 minutes or until light golden brown.

chocolate cutout cookies

Posted on

October means apple season, Halloween and the World Series!  I originally planned on baking cookies to celebrate the Texas Rangers winning the World Series, but sadly, they lost to the Cardinals in Game 7.  I’m still pretty heartbroken over it, but luckily, I can always count on baking to cheer me up.  Even when it’s snowing outside, I mean really snowing (in October!?).

Note that this was supposed to be posted on Monday, October 31st…  I had the cookies made and pictures taken.  However, if you know me, it seems appropriate that I somehow made it possible for me to be “late” with my first blog post.  If I hadn’t made Halloween cookies it wouldn’t be so obvious that it’s late.  But I did.  And there is no hiding it…  Happy Belated Halloween!

6
6
6
6
10

This cookie dough tastes like brownie batter.  MMmmmmm!  … yes I ate some of the dough.  You have to do that to make sure your cookies are going to taste good.

Isn’t that what all the professionals do?

As long as your mom (or older sister) doesn’t catch you doing it, it’s okay you can eat some of the dough.  You should at least try a little, tiny piece of it.

When I use my Halloween cookie cutters, I prefer making the chocolate cutout cookies over traditional sugar cutouts.

I guess because Halloween is dark and scary… and for me dark translates to chocolatey things…  I dunno.  :) Also! this dough is better for making bats and cats… you don’t even have to ice them.. they’re already black(ish)!

These cookies are soft, chocolatey and delicious.

Enjoy with a nice cold glass of milk!

Chocolate Cutout Cookies

adapted from Allrecipes.com

1 ½ cups flour

¾ cup unsweetened cocoa powder

1 ¼ teaspoon baking powder

¼ teaspoon salt

½ teaspoon cinnamon

¾ cups unsalted butter, softened

1 ¼ cups granulated sugar

1 large egg

½ teaspoon vanilla

  1. Stir together flour, cocoa powder, baking powder, salt, and cinnamon; set aside.
  2. Cream butter and sugar together until smooth.  Add the egg and vanilla; beat until well combined.
  3. Gradually stir dry ingredients into creamed mixture; mix well.  The dough may seem dry and be a little tough to stir—this is where you get your arm workout in!
  4. Divide dough in half, wrap in wax paper or plastic wrap, and refrigerate for 1 to 2 hours.
  5. Preheat oven to 375 degrees F.
  6. Remove dough from fridge.*  On a lightly floured surface (I used cocoa powder instead of flour), roll the dough out to 1/4 inch thick.  Add more flour (or cocoa)** as needed to prevent dough from sticking.
  7. Using cookies cutters, cut into desired shapes.  Brush excess flour (or cocoa) off the cookies.  Place cookies on baking sheets lined with parchment paper or a silicone mat.  The cookies won’t spread much during baking so don’t worry about leaving a lot of space in between the cookies.
  8. Bake for 8-10 minutes.  Allow cookies to cool on baking sheet for 5 minutes before moving to wire rack to finish cooling.
  9. Decorate as desired!  I used a basic sugar cookie icing and sprinkles.  They also look pretty with powdered sugar sprinkled over them.  Store cookies in an airtight container to keep them soft.  If you have a problem with the cookies getting hard, add a slice of bread to the container and it will soften them up.  :D

*When you take the dough out of the fridge, you may have to knead it (just a little bit) in order to make it more pliable for rolling.  Don’t play with the dough too long or it will warm up and stick to everything.

**Be careful not to add too much flour or cocoa powder—that will make your dough dry and crumbly.  I mix in a little of the unused dough each time I roll out the dough—helps prevent dough from becoming dry.